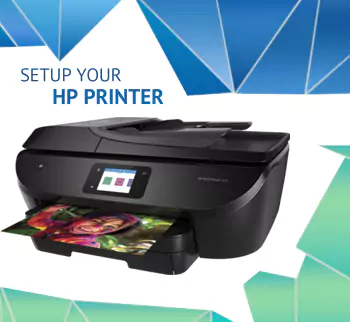
For the newly bought HP laserjet 9000 printer you need to set it up before giving printing commands. Since for HP laserjet 9000 printer setup process, you have to complete a few tasks, but before that let’s unpack the printer and keep it on a cleaned table and inside a well-ventilated room.
Hp laserjet 9000 printer is a one-stop-destination for the printer lovers because gives HD prints, can scan documents, support fax service, and can be connected with smartphones. In this advanced era where everyone and everything is moving so fastly, people today love that can match their current needs. And 123.hp.com/laserjet 9000 printer is has everything that a modern printer can serve. It is best for office use as well as for home use, get your images printers, pie-chart for presentation, at home kids need high-quality pictures for their projects, you can decorate your house by printing amazing HD pictures and images from HP laserjet printer.
Before having its service you need to complete its setup process. So let us start the setup process from start.
Unpack your printer box, and remove all the tapes. Check if there is any tape inside the printer for safety, if yes then carefully remove them as well. After removing all the packaging material put your printer on a clean table, and follow the below points to move ahead.
Now your printer’s setting is done, the printer is completely ready to give the prints. However, still, you cannot get the prints because you have to set up the printer software on your computer and then have to connect it. While getting prints from the Mobile phone, you don’t need to have drivers. Or if you decide to get the prints using Google Cloud Print and ePrint services, in this case as well you won’t need any printer drivers.
Hence, it is your choice how you want to get prints.
Getting printer drivers are very essential task to do, this makes your computer to give the command to the printer to bring out the print as you requested. Apart from this, you can also go for other means and that we will discuss later in another section. Here you will learn to download and install HP LaserJet 9000 printer driver.
Once the printer driver installation process is completed, now you have to restart your computer. Now connect your printer wirelessly or using USB with the computer.
To establish the connection between your printer and computer, you need to decide whether you want to connect it wirelessly or using the USB cable.
To connect the computer using a USB cable is very simple, open the Printer Control Panel and open Setup Wizard. Now choose the UBS option. Now insert one port of the USB cable with printer and another port with the computer. Go to the ‘Add printer’ window and select the HP laserjet 9000 printer from the list.
To add your printer wirelessly, first, you need to connect your printer and the computer both with the same network. After this go to printer control panel and select Wireless option in Setup Wizard. Now click on ‘Add printer’ option on your computer and see your printer in the list. Select the HP laserjet 9000 printer to complete the setup.
HP laserJet printer is also cable of using modern technology to give you HD prints, without connecting and downloading printer- such as Google Cloud Print and ePrint. However, to utilize them you need to set up your printer.
Google Cloud Print service is the free service and it allows you to print a document from any network-enabled device to your HP laserjet 9000 printer. You don’t need any driver or software for this, it is a simple process to get fast HD prints. Therefore, follow the below instructions:
To enable Cloud Print check below things:
And here it is, you are done with your Google Cloud Print, now you after a second you will get your print in the output tray. Through this, you can print from anywhere, and using any device- desktop, laptop, smartphone, and tablet.
The ePrint service is very comfortable and easy to use, it is a free service you just need to connect your printer and device with the internet. Follow the below steps to use ePrint service in your HP printer.
Locate the Printer’s email address:
Now use this printer’s email address to send the document that you wish to print. After getting an email from your side, the printer will print the document the same as you requested. ePrint service is the easiest and handy service for the HP LaserJet 13020 printer users, they can get their prints from anywhere and anytime. You just need to make sure that the printer should be connected with the internet.
However, while doing the setup, if you face any issue with your printer and fail in setting any of the above-mentioned services you can ask the experts for the help. 123.hp.com/laserjet 9000 printer experts will surely get you out of the issue.
| HP Sales - 1 (888) 999-4747 |
|---|
| HP Customer Service - 1 (650) 857-1501 |
| HP Support - https://www8.HP.com/us/en/home.html |
| HP Connect - https://www.HPconnected.com/us/en/signin |
| HP Shop Online - https://store.HP.com/us/en |
| HP Driver Downloads - https://support.HP.com/us-en/drivers |
| HP Printer Driver For IOS/Mac - https://support.apple.com/kb/dl1888?locale=en_US |
| HP Official Support - https://support.HP.com/in-en/products/printers |
| Contact HP Shopping - https://www8.HP.com/us/en/contact-HP/shopping.html |
| HP Printer Setup - https://123.hp.com/us/en/ |
| Printer setup from the HP - https://123.hp.com/us/en/devices/setup |
| Offical Address HP Inc. 1501 Page Mill Road, Palo Alto, CA 94304 P.C. 94304-1112 Palo Alto United States |